Monday, December 24, 2012
Untitled
Thursday, December 20, 2012
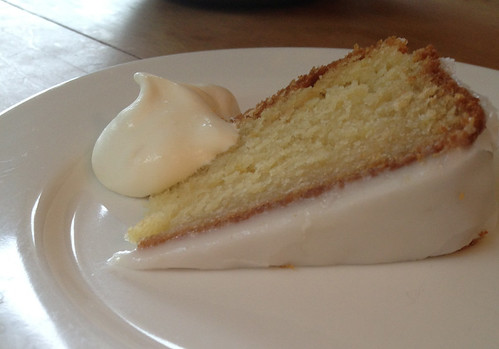
Egg-free stress-free lemon cake
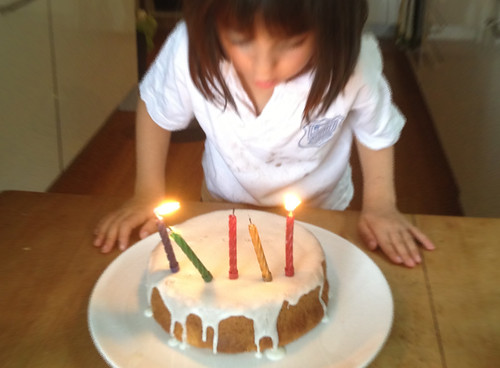
It was my little girl's 5th birthday yesterday and for her family dinner she requested homemade pizza (a girl after my own heart ;-) and a lemon birthday cake, so I went in search of an egg-free version that her allergic sister could eat too.
The previous week the birthday girl had a celebration with a few little friends and I'd made a special cake that had caused me no end of problems and a very very late night the night before trying to get the b&@;/! thing to work :-( So for the family dinner I wanted something very simple. With no chocolate. And no lollies. And definitely no late night preparation.
And can I just say that if you're reading this and thinking of having a baby, can I suggest that if you have any way to control it, I'd not plan a due date around Christmas! Trying to get organised for the holidays and a birthday is not my idea of fun. But anyway, we survived... and we have a new egg-free cake to add to our repertoire. Yay! Here's the recipe in case you'd like to try it too.Stress-free, egg-free lemon cake, decorated by birthday girl
Linking up to my creative space over here.Egg-free lemon cake Recipe from www.spiceupthecurry.com1 ¾ cups plain (all purpose) flour
1 teaspoon baking soda
2 teaspoons baking powder
115g/1 stick/½ cup butter, softened
½ cup sugar
1 ¼ cups plain yoghurt
3 tablespoons lemon juice
Lemon zest from 1 lemon
1 cup icing sugar (Confectioner’s sugar)
2 tablespoons lemon juice
Preheat the oven to 350 degree F (180 degree C). Grease and paper a 9 inch round cake pan and keep it aside.
Mix flour, baking soda and baking powder in a bowl and set aside. Put softened butter in a separate bowl and beat it with a mixer til light. Add sugar and beat til light and fluffy. Add yogurt and beat til mixed. Add lemon juice and lemon zest and mix well again. Add half of the flour mixture and beat it til incorporated. Then add remaining flour mixture and beat well.
Pour batter in prepared cake pan. Lightly tap on counter top to remove any air bubbles.
Bake in preheated oven for 30-35 minutes or a toothpick inserted in middle of cake will come out clean. Let it cool for 5 minutes in a pan then remove it to a cooling rack and let it cool completely before icing.
Icing: Sift powdered sugar in a bowl. Add 2 tablespoons of lemon juice and stir until you get thick and smooth glaze. When you drop glaze from spoon it should be smooth and runny. Add more lemon juice or sugar as needed. Pour icing over top of cake. Spread it with butter knife and let it drip down from sides. Let the icing dry before you serve or cover and store for 3/4 days.
Thursday, December 6, 2012
Making and knowing when to draw the line
In my creative space this week I printed some more of my 'lights' design, this time using a different colour palette. I loved the neon design I printed last time but was keen to try another colourway. This one feels more like me.
I had fun experimenting with printing on different woven fabrics and love how different the inks and design can look on different materials. I found that when I printed on the coarsers fabrics (more open weave) the texture comes through really nicely and becomes an element in the design. I love the coarse linen but really love the effect on the hessian (burlap ). It's the first time I've printed on it and loved the effect, experimenting with mixing inks directly on the screen. I've got lots of ideas around this. Hopefully one day I'll get to explore it further.
So that's it for me on the 'making to sell' front at the moment. I really love doing it, and enjoy people enjoying my designs, but I've found it pretty hard going juggling my 3 littlies and household, and the myriad of activities, needs and wants of everyone. And I know from past experience that when the super late nights start to stack up I end up being grumpy mummy and no one is happy :-(
For the next couple of weeks I need to get organised and make those special homemade gifts that I have in mind.How are you doing in the run up to the holiday season?
Visit my creative space for lots of creative goodness.
Friday, November 30, 2012
My creative space
In my creative space this week I've mainly been filling orders from my new Neon Lights design.
 It was really nice to have some lovely promotion on Monday. First I was featured in Madeit's 'Monday Finds' newsletter and shopping guide. I really like our Australian home grown handmade store. It somehow seems to have a personal feel. And then the lovely Steph from Bondville featured my things in her blog post that day.
When you design and create in an isolated environment where you're not getting feedback (asking the cat what he thinks doesn't seem to work ;-) I find it's easy to wonder if what you're doing is up to scratch and will it be of interest to others? So it's fantastic to get these kind of endorsements. Thanks Madeit and Bondville!
 Also in my creative space I've been gathering materials for holiday gift wrapping.
 There seems to be a red and natural theme going on.
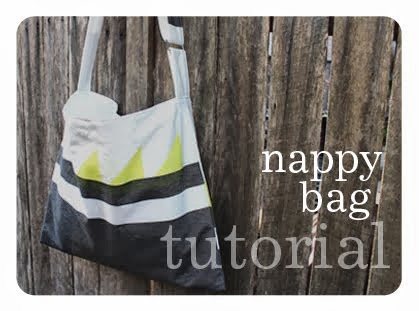
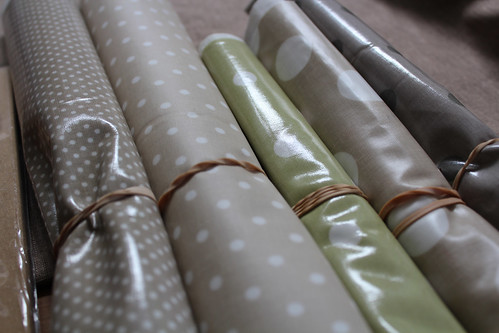 And I found these gems in my favourite fabric shop The Remnant Warehouse, perfect for making scooter bags for the kids Christmas presents. Think I'll use this tutorial as a basis.
How is your holiday prep going? I'm trying not to panic about all the things on my 'to do' list in the next few weeks and hoping I get around to making at least some of them.
Joining in on my creative space.
When you design and create in an isolated environment where you're not getting feedback (asking the cat what he thinks doesn't seem to work ;-) I find it's easy to wonder if what you're doing is up to scratch and will it be of interest to others? So it's fantastic to get these kind of endorsements. Thanks Madeit and Bondville!
How is your holiday prep going? I'm trying not to panic about all the things on my 'to do' list in the next few weeks and hoping I get around to making at least some of them.
Joining in on my creative space.
Wednesday, November 28, 2012
My Belladone saga
I wanted a new dress for an event that we were invited to recently and bought the Belladone pattern with that in mind, though I think it will make a great day dress too. If time permitted I would make several more of these, and in time hopefully will. But for now I made the two below: the black as a kind of wearable muslin and the blue was intended to be the real thing. In the end I ran out of time and wore the muslin as the finished thing!
Now, if you're not a fanatical sewing enthusiast or not looking to make this pattern you may want to tune out after the pictures as its going to get a bit boring :-) For those interested I have listed my process below - I find that sort of thing useful so hopefully you will too. I'm hoping to do a proper Pattern Review one day but for now I just need to get this off my chest ;-)...

Now, if you're not a fanatical sewing enthusiast or not looking to make this pattern you may want to tune out after the pictures as its going to get a bit boring :-) For those interested I have listed my process below - I find that sort of thing useful so hopefully you will too. I'm hoping to do a proper Pattern Review one day but for now I just need to get this off my chest ;-)...
The black one:
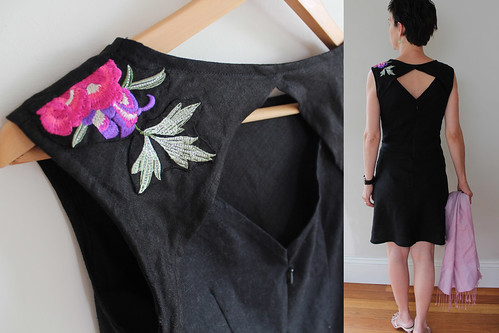
This was meant to be the wearable muslin, but ended up being it. In its former life the fabric was a tunic bought by my friend T while on a night out together - popped into Vinnies before dinner for a look ;-). I think I talked her into buying it (sorry T) but she never wore it and ended up giving it to me to use. I loved the black linen, it was pretty long (almost enough fabric to use) and I loved the machine embroidered flower. So I chopped it up, strategically placing the flower on my hip. But I was just short of fabric so skipped the front pleats and had to use a scrap of black linen from my stash (slightly different black) for the lower back panels.
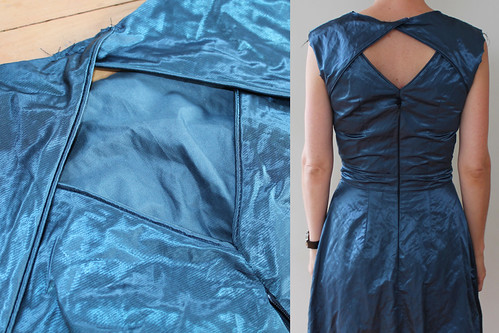
And I added a left over flower to the opposing back shoulder for a bit of detail in balance. Oh that cross cut-out back, it's such a lovely detail of the pattern.
When I'd almost finished it I decided if I didn't get the proper version finished in time I could probably wear this, and left it with unfinished armholes, neckline and hem to start the proper version...
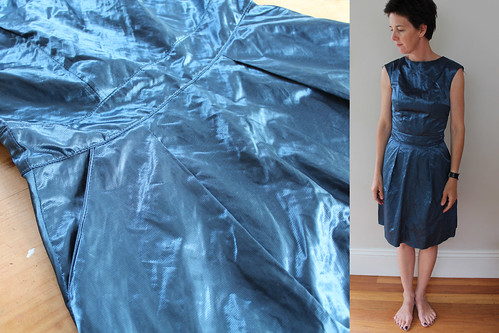
The blue one:
I went on a special trip, using precious child-free time, to The Fabric Store to buy something special. I came away with a length of a Lisa Ho fabric, an amazing blend of silk, man made fibres and I think a touch of metal. It feels amazing. I'm sure I probably wore a greasy spot on it as I touched it every time I walked past it sitting by my machine :-).
All was going well, I even tried a little piping sample (I'd fallen in love with this piped edge version) and decided to pipe lots of the seams. So one evening was spent on piping, then the next evening I sewed it all together (this was no. 3 so I was getting quicker), excitedly put it on after sewing in the zip and... could hardly breathe it was so tight around my middle. Ok. So the black linen was cut on the bias, giving it more 'give'. Not a true muslin at all of course. So that nagging feeling I had that I should grade the pattern up a size at the waist? I should have listened to it :-(.
Can I breathe out now?
So I found myself with 2 mostly finished dresses, late the night before it needed to be finished (with zero time available to sew the next day). Sucking in my breath I asked the Mr for an opinion on which was better. I so wanted to wear the blue but knew it realistically needed a good few hours of alterations to get it right. So when he picked that the fit was wrong I was kind of relieved. At least I'd be able to do useful things like walk, and sit and you know, breathe, if I wore the black. So the late night sewing session was spent finishing off the black instead of the blue.
But I'm hoping I'll get around to fixing it one day - probably when the next event is looming... late the night before of course!
If anyone is still reading, I applaud you :-)
And finally, just some pattern notes:
* the Pattern is written in French, which I don't speak, but between the pictures and Google Translate it was not too hard to understand. Though there were a few 'ah ha' moments for me by the time I got to version 3, which I'm guessing may have been resolved earlier if the language barrier hadn't been there.
* I lengthened the bodice by an inch (I seem to have a long body - the Mr says I have short legs but I prefer to think of it as a long body :)
* And I reshaped the neckline, making it higher & wider - slightly more boat neck shaped than the pattern as I think this suits me better, just a personal preference.
* I quite like the pleat-free adaptation of the front skirt on the black version, but maybe it just suits my shape better, and may use this alteration in future.
The moral of my Belladone saga: don't use bias cut fabric for the muslin! And leave more time for unexpected occurrences - when will I learn!!
Sunday, November 25, 2012
Wristlets

I made some more wristlets in my neon lights design, this time to put in my shop. I'm also starting to make some Christmas presents and trying hard not to keep adding to the 'to do' list!! A less frantic lead-up to Christmas this year would be nice, but I think I know myself well enough by now - there's not much chance of that ;-)
Hope you've had a nice weekend!
Thursday, November 22, 2012
Thoughts on motherhood: not underestimating the littlies
When doing craft with the kids I've often not been as patient as I'd like to be with them, which makes me a bit sad as I really want them to enjoy it. I find they want to try every step of the project at hand themselves. But you know how it is... dinner is running late, there's a huge mess you keep stepping around, the cat is squeeling for food, the washing needs to be hung out, and there's homework and vaccumming to do and someone has smeared yoghurt everywhere and wee'd in their pants... and it would just be quicker if I DID IT MYSELF, for goodness sake!!!!
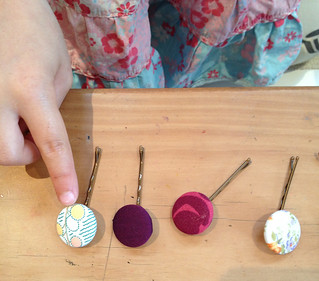
So when my girls wanted to make some hair clips just before dinner time this afternoon I took a deep breath and told myself to stay calm. My friend Deb showed us how to cover buttons and use them for hair ties and clips recently and we loved it. Deb is so crafty, always has something interesting on the go, great projects and all sorts of ideas. There's something new to explore every time we see her and her family. Have you tried this? It's lots of fun and great for using up small scraps of treasured fabrics.
I knew the big girl (who's 7) would be fine with each step, but the little girl, who's not quite 5 also wanted to do it all by herself. I thought it would be too much for her but she did a fantastic job, even choosing a scrap of marimekko fabric out of the hundreds in my scrap box (a girl after my own heart :-). She held the small scraps and button holder in her small hands and used my big fabric scissors to neatly trim the excess fabric (deep breath!) and she was patient and methodical - teaching me a lesson!! And when I asked if I could take some pics along the way she sweetly agreed.
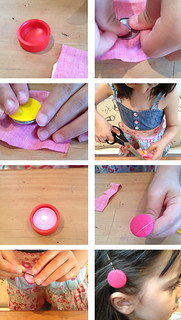
She's a funny one our little girl - drives us all insane with her craziness at times then turns around and floors us with her grown up ways. Tomorrow morning we're off to her second orientation for big school next year and I'm sure she'll take it in her stride, wearing some very pretty hair clips :-)
Belatedly playing along with My Creative Space again this week. Get your dose here.
So when my girls wanted to make some hair clips just before dinner time this afternoon I took a deep breath and told myself to stay calm. My friend Deb showed us how to cover buttons and use them for hair ties and clips recently and we loved it. Deb is so crafty, always has something interesting on the go, great projects and all sorts of ideas. There's something new to explore every time we see her and her family. Have you tried this? It's lots of fun and great for using up small scraps of treasured fabrics.
I knew the big girl (who's 7) would be fine with each step, but the little girl, who's not quite 5 also wanted to do it all by herself. I thought it would be too much for her but she did a fantastic job, even choosing a scrap of marimekko fabric out of the hundreds in my scrap box (a girl after my own heart :-). She held the small scraps and button holder in her small hands and used my big fabric scissors to neatly trim the excess fabric (deep breath!) and she was patient and methodical - teaching me a lesson!! And when I asked if I could take some pics along the way she sweetly agreed.
She's a funny one our little girl - drives us all insane with her craziness at times then turns around and floors us with her grown up ways. Tomorrow morning we're off to her second orientation for big school next year and I'm sure she'll take it in her stride, wearing some very pretty hair clips :-)
Belatedly playing along with My Creative Space again this week. Get your dose here.
Monday, November 19, 2012
Wiksten tank
As you may know, the Wiksten tank pattern has a cult following in sewing blogs. But up until recently it hadn't really appealed to me. I thought it looked a little shapeless, and I'm trying hard not to buy patterns just because they are popular and look good on others. Sometimes I have an inkling that a pattern is not really my style or won't suit my figure or lifestyle, but I see a few versions I like so I give it a try.
But I'm happy to say that I was wrong about this one as I really like it.
 I used an old piece of printed voile from my stash, bought at Spotlight. I must say, there are some fabulous voiles at Spotlight at the moment. I bought some recently to make some harem pants for my girls for summer and it was so hard to choos just two.
 Overall I really liked this pattern. The side seams are French seams, making it beautifully neat, and the neck and arm holes are finished with bias binding, which I love using.
And I love that there's the option to buy this pattern as a downloadable PDF, it makes it much more cost effective than buying the paper pattern, and I also secretly quite like sitting on the living room floor in front of some interesting TV program, cutting and taping a pattern together (glass of wine and block of dark chocolate are nice extras when available ;-)
It's a bit firm around the bust (see the wrinkles above) so I'll go up a size next time, but apart from that I'm really happy with it and plan to make a few more for summer.
Have you made the Wiksten tank? And any plans for summer sewing? I'd love to hear.
But I'm happy to say that I was wrong about this one as I really like it.
And I love that there's the option to buy this pattern as a downloadable PDF, it makes it much more cost effective than buying the paper pattern, and I also secretly quite like sitting on the living room floor in front of some interesting TV program, cutting and taping a pattern together (glass of wine and block of dark chocolate are nice extras when available ;-)
It's a bit firm around the bust (see the wrinkles above) so I'll go up a size next time, but apart from that I'm really happy with it and plan to make a few more for summer.
Have you made the Wiksten tank? And any plans for summer sewing? I'd love to hear.
Friday, November 16, 2012
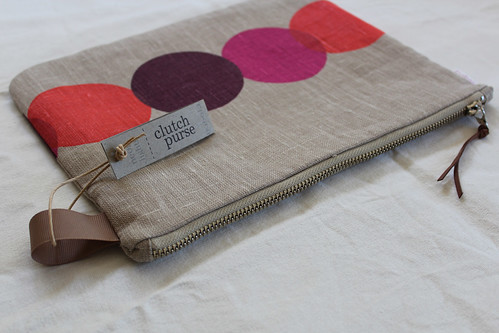
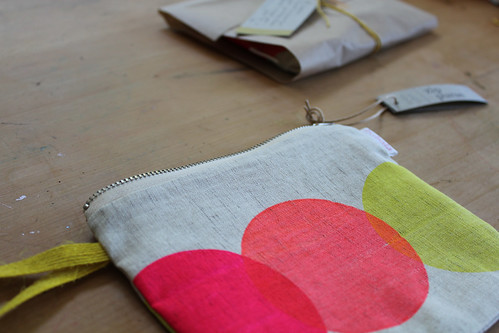
Neon lights iPad sleeves and purses
In my creative space this week I made some things to put in a little local gallery/handmade shop called Sweets Workshop. The owners, Emma and John, are just the most lovely people, very open and encouraging of independent designers and artists and I feel lucky to have a space like this in my local area.


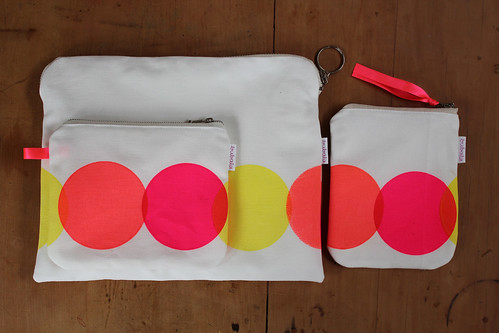
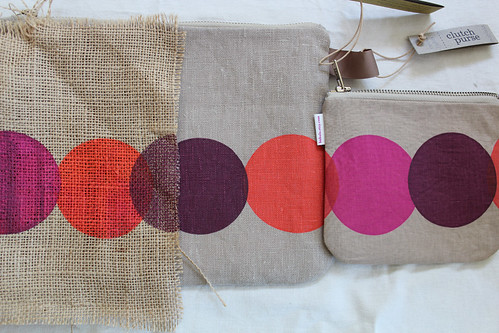
I love seeing the circles all lined up.
I'm off to wear my new Belladone dress tomorrow night (finished, yay!), hopefully I'll show you some pics and do a little review of the pattern next week. Have a great weekend!
I'm planning on making some more kitchen items soon (you may remember my artichoke and beetroot designs if you've been following me for a while) but firstly I couldn't resist the urge produce this little range, which has been in my head for a while now, bursting to get out :-)
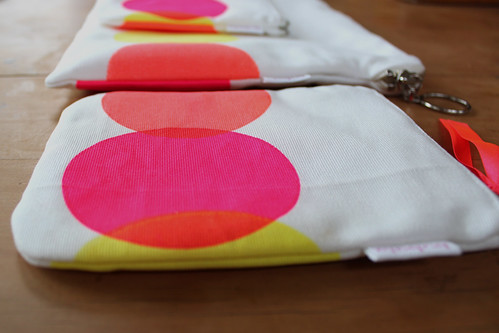
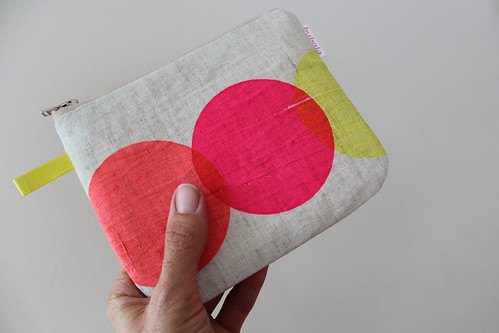
Using my 'lights' design I screen printed some crazy neon colours onto a length of white cotton and also some oatmeal coloured linen.
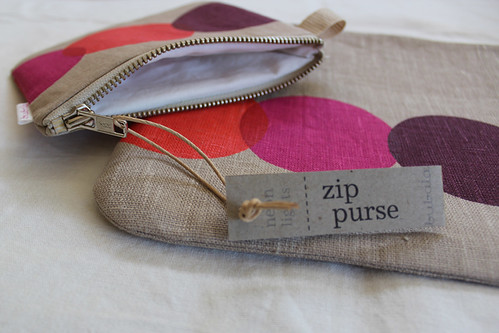
Then I made them into little purses and iPad sleeves, highlighting the designs with bright ribbons and metal zips.
It was fun to go outside of my usual comfort zone and use such bright colours, playing around with the mix of design, fabric, colours and trims to get a balance I liked.
And I couldn't decide if I preferred the inks on the white or oatmeal so decided to do both. It will be interesting to see what sells better.
Im belatedly playing along with my creative space over here.
- - - - I'm off to wear my new Belladone dress tomorrow night (finished, yay!), hopefully I'll show you some pics and do a little review of the pattern next week. Have a great weekend!
Thursday, November 8, 2012
Wrist purse
One of the items I made for the big girl's school fete recently was a pile of small purses with wrist straps. I thought they might appeal to both mums and girls so would hopefully sell well. Of course I forgot to take a photo of them (and the other things). But I do have shots of this one as I kept it for myself (sorry school! ;-)
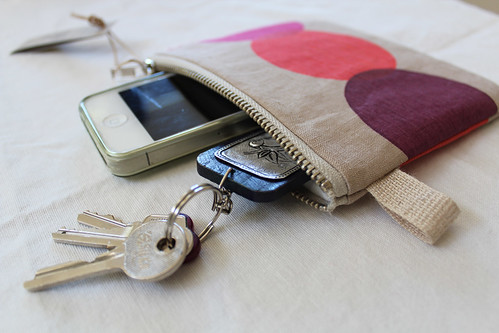
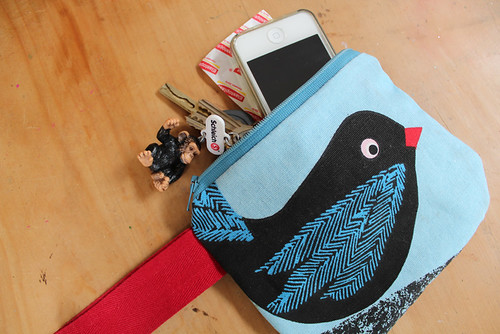 As I was running out the door with the littlies to pick up the big girl from school one day it occurred to me that my sore shoulder could benefit from not carrying my heavy bag containing lots of stuff. And considering that the littles ride often ride their scooters these days it is a very quick trip - with me doing a jog at times to keep up with them :-). So in went my phone, keys and bandaids (plasters) for those inevitable scooter stacks.
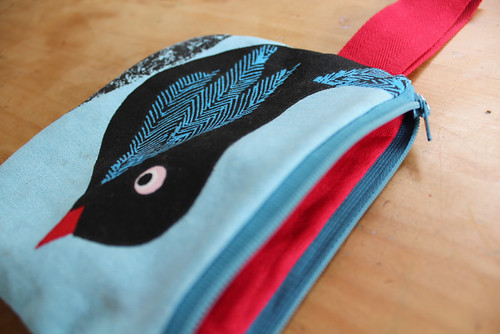 I love the little peek of red linen when the purse is opened.
 And its such a useful shape and size.
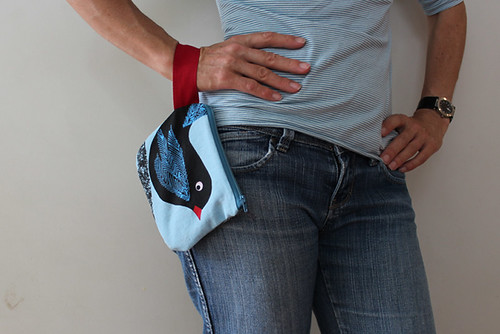
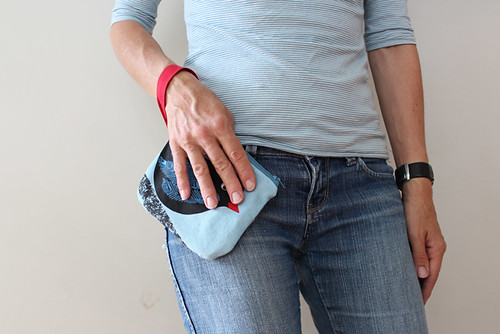
And even leaves my hands free when needed... Pulling along a scooter or two, applying bandaids or taking a turn on a scooter myself.
And the little birdie makes me smile.
Don't you love it when something you kind of haphazardly do turns out to be perfect for your needs.
And even leaves my hands free when needed... Pulling along a scooter or two, applying bandaids or taking a turn on a scooter myself.
And the little birdie makes me smile.
Don't you love it when something you kind of haphazardly do turns out to be perfect for your needs.
Monday, November 5, 2012
Weekend craftiness - gift tags
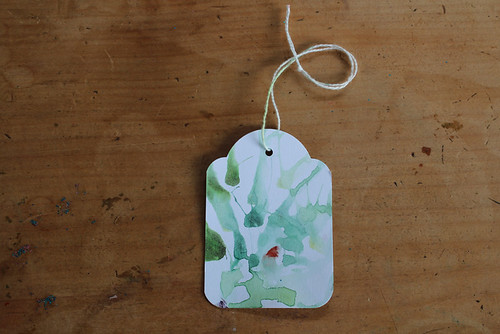
Recently I bought a huge pile of cute blank white gift tags with the intention of decorating them to use as gift tags for Xmas and beyond.
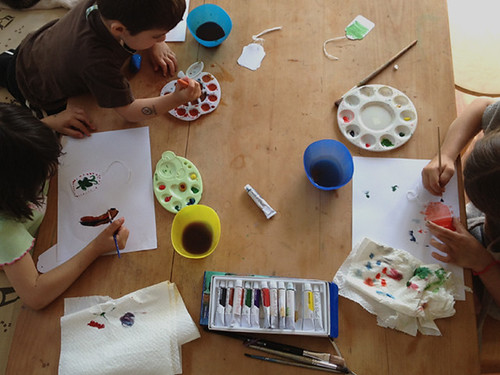

Some experimenting with blowing the paint around with water and really getting into the beauty of watercolour, I think...


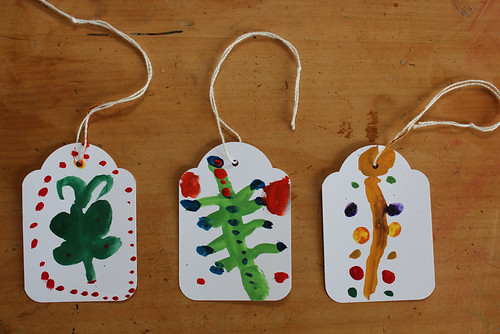
And came up with some interesting designs...

I love seeing what kids do when given freedom to create whatever they like. They're not so constrained by convention and I think it's a nice reminder to us grown-ups to loosen up and go with what feels right.
Now on to the wrapping paper ;-) ...
Thursday, November 1, 2012
Halloween trick or treat bags
Craft for kids has been at the centre of my creative space this week. There's been a lot going on but not much time spare to blog it.
 Anyway... Here are some bags I made for the kids for Halloween to take trick or treating. Last year we had the plastic ones which I think I must have given to the charity shop in a clean-up, as I couldn't find them. They always annoyed me as they took up so much precious storage space, so when I decided to sew some (of course!) I wanted something easy to fold away to use the following years.
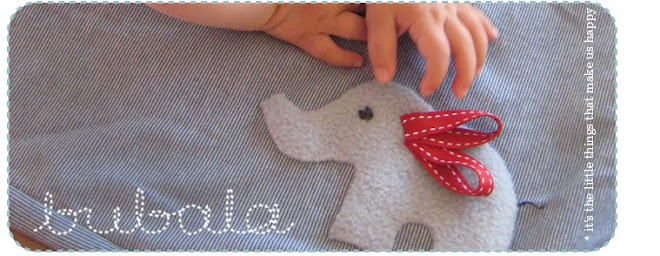
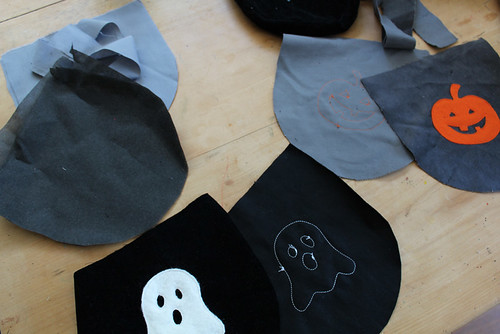
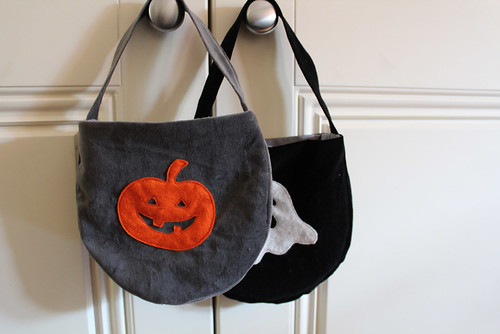 I used some stash velvet for the outsides (see, it's useful having a stash - she says, trying to justify it ;-). The grey was a piece from Ikea and the black was an old thrifted skirt. I drew some halloween shapes onto felt, cut them out and machine stitched them on. The lining is a pale grey cotton from the stash.
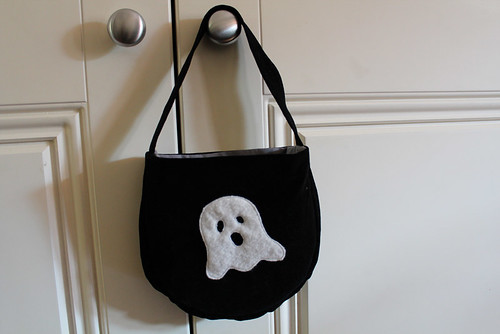 It's a shame I didn't think to get some pics of them stuffed with lollies, being held tightly by little hands. They looked pretty cute.
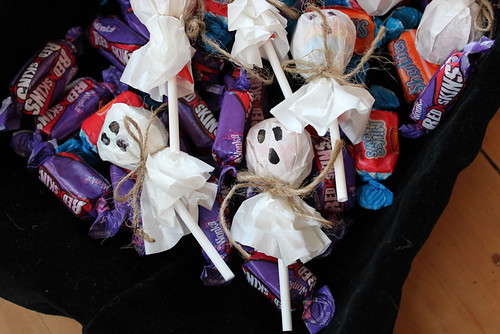 We also made some of these little ghosts from lollipops, wrapping a circle of white paper around, tying it with string and then drawing eyes and mouth on. I can't remember where I saw the idea, but it was a nice little touch, we'll definitely do them again.
More creative spaces to check out over here.
And they were fun to make too, though the deadline got a little tight at the last moment! And as usual the back of the appliqué is strangely more interesting. Have you noticed how that tends to happen?
More creative spaces to check out over here.
Subscribe to:
Posts (Atom)